Once user already get their webmail details access from postmaster,please follow below steps to proceed on mailbox migration:
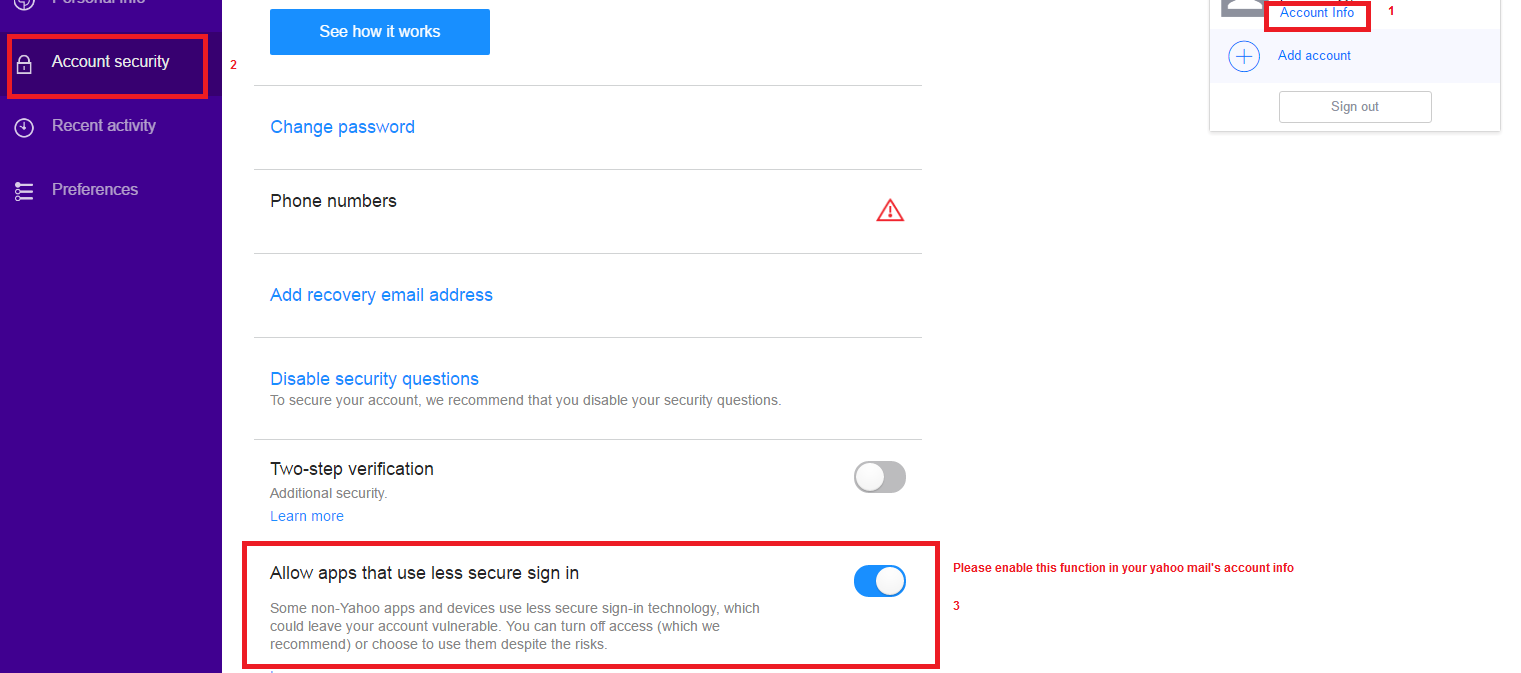
Before the migration,please log into your yahoo mail and go to account info -> account security -> and proceed to enable 'allow apps that use less secure sign in' as below:
1) Login to Ximplify webmail at https://mail.domainname.com

2) After that,kindly set the country and click “Next”

3) In the next interface, kindly click “Finish” as this is optional option.

4) Click on the Settings button on the left (It looks like a gear icon)

5) Expand the Advance Settings folder.
6) Click on Mailbox Migration
7) This will pop up a new window for the Mailbox Migration
8) As you can see you have different options to choose from but in this tutorial we’re going to use the option any of your previous mail platform or choose Yahoo! Mail Plus then click "Next"

9 ) Now place a check mark next to Email and click on the "Next" button

10) In the account settings you want to enter the information of the current email
Type: POP
Server Address: pop.mail.yahoo.com
Port: 995
Username: <yahoo address>
Password: <yahoo mail password>
Click 'Requires SSL'
Now click on Test Connection

11) If the connection works,please click "Next"
Then go ahead and continue the migration for each individual email users you created.
12) Click Start
13) Once the Migration status show Done, can close the Migration pop-up.
Note: The mailbox migration tool will only transfer email, contacts, calendars, tasks, and notes (if supported) from a single third-party mailbox to your mailbox.